Pokazywanie postów oznaczonych etykietą Jumbo Stamper. Pokaż wszystkie posty

wtorek, 21 marca 2017

Hello Spring!

Jest 1szy dzień wiosny i myślę, że kwiatowe, kolorowe mani byłoby na miejscu. Co powiecie na różowe tulipany?

It's the 1st day of spring and I think a flowery, colourful manicure would be in order. How about pink tulips?


Zdobienie jakie dzisiaj pokazuję jest zasadniczo bardzo stare (myśle, że z zeszłego lata), ale bardzo pasuje do tematu wiosny i moja paznokcie były w podobnym stanie jeszcze niedawno (wspominałam, że musiałam je drastycznie skrócić, oto jak bardzo).

The nail art I'm presenting today is actually a very old one (from last summer, I think), but it really suits the spring topic and my nail we're in a similar state just a while ago (I mentioned I had to shorten them drastically, that's how much).


Ponieważ planowałam użyć tinty w tym mani, wybrałam bardzo jasny róż jako bazę. Nałożyłam trzy warstwy Colour Alike Maniurka i myśle, że idealnie się sprawdził jako tło dla ciemniejszych kwiatów.

Because I planned on using tints in this manicure, I chose a very light, pink as a base. I applied three coats of Colour Alike Maniurka and I think it worked perfect as a background for the darker flowers.


Tulipany są wzorem z płytki MoYou London PRO XL 12. Odbiłam je lakierem My Secret Dressed In Black i Stemplem B. Loves Plates Jumbo. Zabezpieczyłam również całość Golden Rose Gel Look zanim zaczęłam kolorować wzór. Tinty jakich użyłam to moje tinty DIY w kolorach 9 (ciemny róż) i 15 (jasna zieleń). Wszystko o nich możecie przeczytać TUTAJ.

The tulips are a design from MoYou London PRO XL 12 plate. I stamped them with My Secret Dressed In Black and B. Loves Plates Jumbo Stamper. I also secured the whole thing with Golden Rose Gel Look before I started to colour the design. The tints I used are my DIY sheer tints in 9 (dark pink) and 15 (light green). You can read all about them HERE.


Poniżej jest płytka MoYou London..

Below is the MoYou London plate..

Źródło: http://moyou.co.uk/

.. i pozostały produkty jakich użyłam.

..and the rest of the products I used.


sobota, 18 marca 2017

Goodbye Winter

Hej!
Myślę, że możemy spokojnie uznać zimę za zakończoną. Nawet tutaj, w południowo-wschodniej części Polski ;) Oznacza to, że jest ostatni moment na spóźnione śnieżne mani i zaraz potem - na powiedzenie śnieżynkom dowidzenia na jakiś czas. Oto jak ja chciałabym pożegnać zimowy sezon.

Hey!
I think it's safe to say that winter is over. Even here, in the south-east part of Poland ;) This means it's the last moment to post some late snowy manicures and after that - to say goodbye to snowflakes for a while. Here's how I'd like to see off the winter season.


Bazowy kolor w tym mani to czarny. Nałożyłam dwie warstwy Kiko 275 Black na każdy paznokieć i poczekałam aż wyschnie.
 
The base colour in this manicure was black. I applied two coats of Kiko 275 Black on each of my nails and waited for that to dry.


Główną atrakcją tutaj jest oczywiście holo. Mam nadzieję, że możecie zobaczyć chociaż odrobinę jego wspaniałości na moich zdjęciach (pierwsze trzy są w sztucznym świetle). To ILNP Mega (S) i nałożyłam na paznokcie dwie warstwy.

The main attraction here is obviously the holo. I hope You can see at least a glimpse of it's awesomeness on my photos (the first three are in artificial light). It's ILNP Mega (S) and I put two coats on my nails.


Ta wersja holograficznego top coat'u ILNP jest rozproszone, ale jarównież w nim widziałam liniowo układającą się tęczę. Uwierzcie kiedy Wam powiem, że nie mogłam przestać gapić się na moje paznokcie kiedy wyszlam wieczorem z domu. Ten manicure wyglądam taaaak niesamowicie w świetle lamp ulicznym. Był na prawdę zapierający dech w piersiach.

This version of the ILNP holographic top coat is the scattered one, but I did see the linear rainbow in it as well. Believe me when I tell You, that I couldn't stop staring on my nails when I went out in the evening. This manicure looked soooo amazing under the street lights. It was truly breathtaking.


Oprócz oślepiającego efektu holo, miałam też na paznokciach fajny śnieżynkowy wzór stemplowy. Pochodzi on z płytki Uber Chic Christmas 02. Użyłam do zrobienia go lakieru Kaleidoscope 01 Black i Stempla B. Loves Plates Jumbo.

Aside from the blinding holo effect, I also had a nice snowflake stamping design on my nails. It comes from Uber Chic Christmas 02 plate. I used Kaleidoscope 01 Black polish and B. Loves Plates Jumbo Stamper to do it.


Zdjęcia jakie tutaj widzicie są w świetle naturalnym. Holo było wciąż widoczne, ale nie az tak spektakularne. Moje zdobienie było też pokryte warstwą top coat'u, który mógł lekko stłumić efekt.

The photos You can see here are in natural light. The holo was still visible, but not as spectacular. My nail art is also covered with a layer of top coat, so it might have slightly dulled the effect.


Poniżej możecie zobaczyć płytkę jakiej użyłam..

Below You can see the plate I used..


..i większość pozostałych produktów.

..and most of the products.


niedziela, 18 grudnia 2016

Christmas Tree Manicure

Hej!
Do Bożego Narodzenia jest już mniej niż tydzień :) Chciałybyście zobaczyć moje najnowsze tematyczne zdobienie? Tym razem obejmuje ono zielony brokat, choinki i dużo złota.

Hey!
Christmas is already less than a week away :) Would You like to see my newest themed nail art? This time it involves green glitter, Christmas trees and a lot of gold.


Bazą w tym mani są w sumie tylko dwie warstwy czarnego lakieru. Użyłam My Secret Dressed In Black. Kiedy lakier calkiem wysechł nałozyłam Color Club Object Of Envy (zielony brokat w przeźroczystej bazie). Żeby był mniej kryjący nałożyłam go małym pędzelkiem do zdobień.

The base in this manicure is actually just two coats of black. I used My Secret Dressed In Black. When the polish fully dried I added Color Club Object Of Envy (green glitter in a clear base). To make it less opaque I applied it with a small nail art brush.


Choinki jakie mam na paznokciach pochodzą z płytki Uber Chic Christmas 01 i odbiłam je Born Pretty Store #1. To bogaty złoty lakier do stempli, jak widzicie bardzo napigmentowany i widoczny na ciemnych bazach. Stempel jakiego użyłam to B. Loves Plates Jumbo.

The Christmas trees I have on my nails come from Uber Chic Christmas 01 plate and I stamped them with Born Pretty Store #1. It's a rich golden stamping polish, as You can see very pigmented and visible on dark bases. The stamper I used is B. Loves Plates Jumbo.


Zabezpieczyłam mani top coat'em Kads żeby uniknąć rozmazania wzoru i zmatowiłam Golden Rose Matte Top Coat.

I secured this manicure with Kads top coat to avoid smudging the design and matted it with Golden Rose Matte Top Coat.


Poniżej możecie zobaczyć po raz kolejny moja ulubioną świąteczną płytkę..

Below You can see once again my favourite Christmas plate..

Źródło: http://uberchicbeauty.com/
..i produkty jakich użyłam.

..and the products I used.


piątek, 16 grudnia 2016

Another Christmas Manicure

Cześć,
co powiecie na kolejne świateczna mani? Tym razem to jaśniejsza propozycja, ale tak samo szybka i prosta jak moja poprzednia.

Hi,
how about another Christmas manicure? This time it's a lighter proposition, but just as quick and simple as my last one.


Baza jaką mam na paznokciach to jedna warstwa Safari 56 i dwie warstwy Bell 02 z kolekcji Maroccan Dream. Safari to zwykła biel żeby poprawić krycie następnego lakieru. Bell to różnież biały lakier jednak z mnóstwem złotego shimmer'u, więc wygląda na bardziej waniliowy. Sam w sobie nie ma najlepszego krycia, więc zdecydowałam się nałożyć go na moją najlepszą biel.

The base I have on my nails is one coat of Safari 56 and two coats of Bell 02 from the Maroccan Dream collection. Safari is just a plain white to build up the coverage of the next polish. Bell is a white coloured nail polish as well, but with lots of gold shimmer, so it appears more vanilla. On it's own it doesn't have the best coverage, that's why I decided to apply it on my best white.


Wzór jaki widzicie na moich paznokciach pochodzi po raz kolejny z niesamowitej płytki Uber Chic Christmas 01. Odbiłam go przy pomocy Colour Alike & B. Loves Plates B. a Red Dragon oraz Stempla B. Loves Plates Jumbo.

The design You can see on my nails comes again from the amazing Uber Chic Christmas 01 plate. I stamped it with Colour Alike & B. Loves Plates B. a Red Dragon and B. Loves Plates Jumbo Stamper.


Zdobienie zostało zabezpieczone jedną warstwą top coat'u Kads i jedną warstwą INM Out The Door. Jak widzicie - żadnych smug. Myślę, że to będzie moja ulubuina kombinacja top coat'ów. Kads sam nie daje wystarczającej tafli i lubię właściwości wysuszające INM, więc nakładam oba.

The nail art was secured with one coat of Kads top coat and one coat of INM Out The Door. As You can see - no smudging. I think this will be my favourite top coat combination. Kads on it's own doesn't give enough gloss and I like the fast drying properties of INM, so I just apply both.


Poniżej możecie zobaczyć płytkę UC..

Below You can see the UC plate..

Źródło: http://uberchicbeauty.com/

..i większość pozostałych produktów jakich użyłam.

..and most of the products I used.


środa, 9 listopada 2016

Ostatnia Szansa Na Jesienny Manicure?

Last Chance For An Autumn Manicure?

Cześć :)
Prognozy pogody przewidują śnieg w najbliższej przyszłości, więc to może być ostatnia szansa na jesienny manicure. Tym razem bardzo chciałam wypróbować jeden z lakierów do stempli Colour Alike & B. Loves Plates Hello Autumn, więc skończyłam z bordowymi liśćmi klonu na paznokciach. Nie przemyslałam tego, zdecydowanie powinnam była pójść w te faktyczne, czerwonawe liście klonu, ale cóż.. już po ptokach ;)

Hello :)
Weather forecasts are predicting snow in the nearest future, so it might be the last chance to do an autumn manicure. This time I really wanted to try out one of the Colour Alike & B. Loves Plates Hello Autumn stamping polishes, so I ended up with maroon maple leaves on my nails. I didn't think this through, I definitively should have gone for actual, reddish maple leaves, but well.. what's done is done ;)


Kolor bazowy na moich paznokciach to jeden z moich ulubionych nudziakowych odcieni - O.P.I My Vampire Is Buff. Absolutnie kocham ten lakier, a jak na taki jasny odcień na prawdę fajnie się nakłada. Mam na paznokciach trzy cienkie warstwy, ale dwie grubsze też dałyby radę.

The base colour on my nails is one of my favourite nude shades - O.P.I My Vampire Is Buff. I absolutely love this polish and for such a light shade it applies really nicely. I have three thin coats on my nails, but two thicker ones would also do the trick.


W ostatniej chwili zdecydowałam, zę jest za wsześnie na sweterkowe paznokcie i wybrałam zamiast nich liściasty wzór z płytki Born Pretty Store BP-L024. Użyłam lakieru do stempli Colour Alike & B. Loves Plates B. a Falling Leaf i Stempla B. Loves Plates Jumbo.

At the last moment I decided it's to soon to do sweater nails and I picked the leaves design from Born Pretty Store BP-L024 plate instead. I used Colour Alike & B. Loves Plates B. a Falling Leaf stamping polish and B. Loves Plates Jumbo Stamper.


Ciąglę testuję Seche Vite jako top coat, więc i tym razem go nałożyłam. Jest na prawdę dobry jeśli chodzi o stemple. Nic nie rozmazał! Nie spowodował też żadnego kurczenia lakieru. Ostatnio przy jednym z moich halloween'owych mani ściągnięcie jakie zaobserwowałam najpewniej było spowodowane matowy top coat'em, a nie Seche Vite. Lubię ten top coat co raz to bardziej :)

I'm still testing Seche Vite as a top coat, so I applied it this time as well. It's really good when it comes to stamping. It didn't smudge a thing! It also didn't cause any shrinking of the polish .Recently in one of my Halloween manicures the shrinking I observed was most likely caused by the matte top coat and not Seche Vite. I'm liking this top coat more and more :)


Poniżej możecie zobaczyć produkty jakich dzisiaj użyłam.

Below You can see the products I used today.


czwartek, 20 października 2016

REVIEW: Born Pretty Store Nightscape Water Decals

Cześć,
tym razem przychodzę do Was z kolejna recenzją Born Pretty Store. Już od jakiegoś czasu miałam ochotę wypróbować krajobrazowe naklejki wodne i właśnie one przyszły w ostatniej paczce. Widziałam wiele zdobień z konturem miasta i byłam zakochana w każdym jednym. Niektóre były ręcznie malowane, niektóre stemplowe i pomyślałam, że naklejki wodne będą najprostszym sposobem na osiągnięcie takiego samego efektu. Poniżej możecie zobaczyć jak moje nowe naklejki wodne wyglądają, a znajdziecie je TUTAJ.

Hi,
this time I'm coming to You with another Born Pretty Store review. For some time now I was eager to try out landscape water decals and that's exactly what came in my last package. I saw numerous nail arts with a city contour and I loved every one of them. Some were freehand painted, some were stamping nail arts and I though that water decals would be the easiest way to achieve the same effect. Below You can see how do my new water decals look like and You can find them HERE.


Kartonik naklejek, który do nas przychodzi ma 12 rzędów krajobrazów miast i mają one odzwierciedlać niektóre z najbardziej znanych miast na świecie. Dostajemy też trzy różne typy krajobrazów: tylko kontur, czarny wzór i kolorową wersję. Dużym plusem jest to, że naklejki są cienkie. Ich krawędzie są niezauważalne na paznokciu kiedy zabezpieczymy zdobienie top coat'em. Jedyny problem jaki z nimi miałam to fakt, że ponieważ wzór jest dość długi, (nawet jak potniemy go na pasujące do paznokci kawałki) naklejka potrafi się czasem skleić do kupy jeśli nie jesteśmy dość ostrożne. Jest to oczywiście do ogarnięcie, ale przytrafiło mi się raz czy dwa. Jeśli chcecie więcej informacji o tym jak nakładać naklejki wodne, napisałam osobny post na ten temat TUTAJ.

The sheet of decals that comes to us has 12 rows of city landscapes and they're supposed to reflect some of the best known cities in the world. We also get three different types of landscapes: just a contour, a black design and a multicolour version. A big plus is that the decals are thin. Their edges are unnoticeable on the nail when we secure the nail art with a top coat. The only problem I had with them is that because the design is long, (even when we cut it into nail fitting pieces) the decals can sometimes stick together if we're not careful enough. It's manageable of course, but it did happen to me once or twice. If You want some more information on how to apply water decals, I wrote a separate post about this HERE.

Zrobiłam dwa mani używając tych naklejek i muszę powiedzieć, że bardziej podobają mi się na kwadratowych paznokciach niż na moich migdałach. To pewnie kwestia preferencji, ale jest to coś z czego zdałam sobie sprawę. Zwłaszcza przy drugim mani, nie wiedziałam czy pozostałą część paznokcia pod naklejką pokryć na czarno czy nie. Nawet spróbowałam, ale nie wyglądało to dobrze. Co Wy myślicie? Czy pewne wzory sa po prostu bardziej odpowiednie dla konkretnego kształtu paznokci?

I did two manicures using these decals and I have to say I like them more on square shaped nails than on my almonds. It's probably a matter of preference, but that's something that occurred to me. Especially with the second manicure, I didn't know if I should cover the rest of my nail under the decal with black or not. I even tried to, but it didn't look good. What do You think? Are some designs just better for a certain nail shape?


Pierwszy manicure jaki zrobiłam ma zwykłą, niebieska bazę. Nałożyłam dwie warstwy Dewi L34. Możecie o tym lakierze poczytać TUTAJ. Kiedy baza była całkiem sucha dodałam naklejki i zabezpieczyłam je jedną warstwą INM Out The Door.

The first manicure I did has a plain blue base. I applied  coats of Dewi L34. You can read more about this polish in my review HERE. After the base was completely dry I added the decals and secured them with one coat of INM Out The Door.


Poniżej są produkty jakich użyłam.

Below are the products I used.


Moje drugie zdobienie też jest niebieskie, ale tym razem byłam bardziej ambitna ;)

My second nail art is also blue, but this time I was more ambitious ;)


Najpierw pokryłam paznokcie jedną warstwą Essie Avenue Maintain żeby stworzyć bazę pod mój glitter. Lubię tak robić ponieważ czyszczenie skórek przy kremowym lakierze jest dużo wygodniejsze niż przy brokacie. Kiedy mam taką bazę po prostu się jej trzymam podczas aplikacji brokatu i wszystko gotowe. Poprawia to też krycie brokatu i nie musimy nakładać tak wielu warstw. Glitter jakiego użyłam w tym mani to Dewi L56. Kiedy całość była sucha odbiłam wzór imitujący gradient z płytki Bundle Monster BM-XL19. Użyłam lakieru Colour Alike & B. Loves Plates B. a Blue Ocean oraz Stempla B. Loves Plates Jumbo. Moimi następne kroki to: nałożenie jednej warstwy Sally Hansen Maximum Growth żeby zabezpieczyć stemple przed rozmazaniem w późniejszym czasie, dodanie naklejek wodnych i nałożenie jednej warstwy INM Out The Door żeby wykończyć manicure.

First I covered my nails with on coat of Essie Avenue Maintain as a base for my glitter. I like to do that because cleaning up my cuticles is much more comfortable with a cream polish than a glitter. When I have such a base I just stick to it applying the glitter and I'm good to go. It also improves the coverage of the glitter and we don't need to apply so many coats. The glitter I used in this manicure is Dewi L56. When the whole thing was dry I stamped on a gradient imitating design from Bundle Monster BM-XL19 plate. I used Colour Alike & B. Loves Plates B. a Blue Ocean and B. Loves Plates Jumbo Stamper. My next steps were: applying one coat of Sally Hansen Maximum Growth to secure the stamping from smudging afterwords, adding the water decals and putting one coat of INM Out The Door to finish the manicure.


Poniżej są produkty jakich użyłam przy tworzeniu tej propozycji.

Below are the products I used while I was creating this proposition.

Źródło: https://bundlemonster.com/


Born Pretty Store oferuje mnóstwo świetnych rzeczy i jest jednym z  moich ulubionych sklepów z produktami do zdobienia paznokci. Jeśli jesteście zainteresowane zrobieniem u nich zamówienia, skorzystajcie z mojego kodu HMG10 żeby otrzymać 10% rabatu na nieprzecenione produkty.

Born Pretty Store offers a lot of amazing things and is one of my favourite stores with nail art products. If You're interested in ordering something from them be sure to use my HMG10 code to get 10% off on all products that aren't already on sale.

wtorek, 11 października 2016

Lovely Leaves

Cześć!
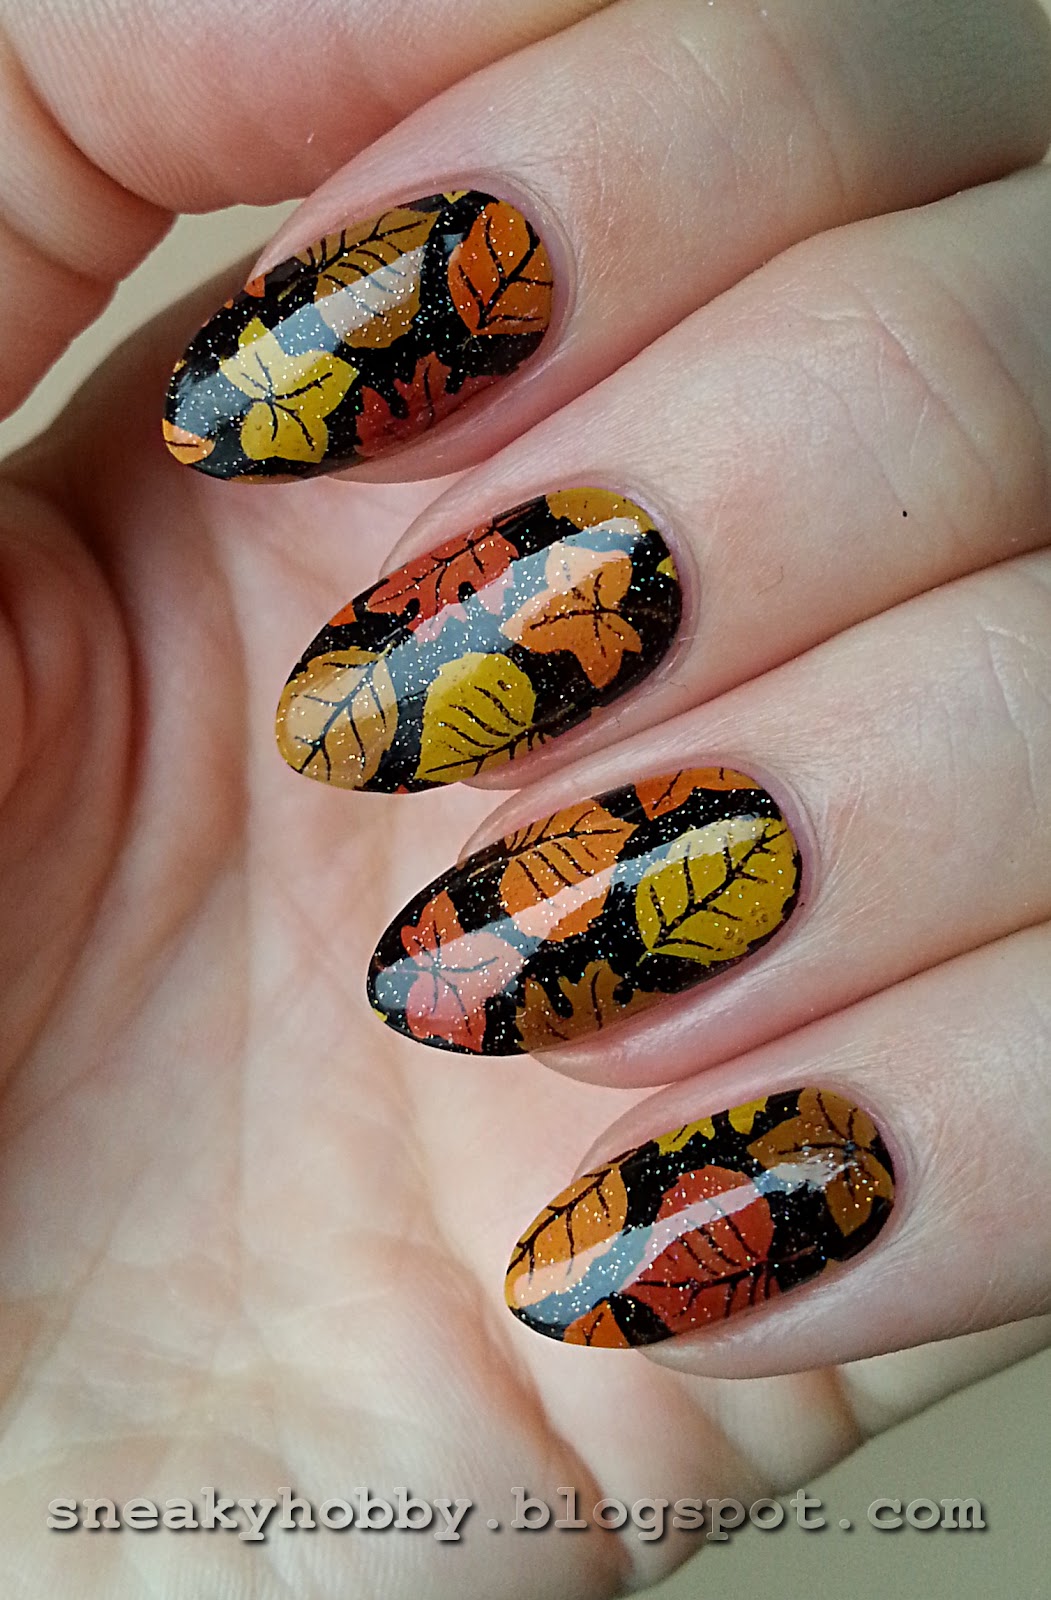
Wiem, że pewnie  na tym etapie znudziły Wam się już trochę jesienne liście. Ostatnimi czasy blogi obfitują w mani z nimi. Próbowałam sprawić żeby moje zdobienia były jak najbardziej inne i interesujące, ale nie mogłam się powstrzymać - musiałam po raz kolejny użyć motywu liści ;)

Hi!
I know You're probably a bit bored with autumn leaves at this point. Nowadays blogs are full of manicures with them. I tried to make my nail arts as different and interesting as possible, but I just couldn't help myself -  I had to use the leaf motive once again ;)


Kolor bazowy jakiego użyłam w tym mani to Color Club Je Ne Sais Quoi. Lakier ten pokrył moje paznokcie idealnie w dwóch grubszych warstwach i nie ma wątpliwości - to bardzo jesienny żółty odcień. Możecie zobaczyć jak wygląda na najjaśniejszych liściach. Pokryłam je co prawda żółtym tintem, ale kolor został praktycznie taki sam.

The base colour I used in this manicure is Color Club Je Ne Sais Quoi. This polish covered my nails perfectly in two thicker coats and there's no doubt about it - it's a very autumnal yellow shade. You can see how it looks like on the lightest leaves. I did however cover them with a yellow tint, but the colour stayed practically the same.


Kiedy moje paznokcie były całkowicie suche odbiłam świetny, liściasty wzór negative space z płytki Uber Chic Lovely Leaves. Użyłam Kaleidoscope 01 Black i Stempla B. Loves Plates Jumbo. Zabezpieczyłam również wzorek jedną warstwą Golden Rose Gel Look.

When my nails were completely dry I stamped an amazing, negative space, leaf design from Uber Chic Lovely Leaves plate. I used Kaleidoscope 01 Black and B. Loves Plates Jumbo Stamper. I also secured the design with one coat of Golden Rose Gel Look.


Zdecydowałam, że chcę pokolorować moje liście titntami, więc wybrałam kilka jesiennych kolorów i zaczęłam wypełniać kształty sondą. Użyłam moich tint'ów DIY w kolorach 2 (żółty), 6 (koral), 9 (ciemne wino) oraz 17 (brąz). Tinty trochę zbąblowały więc całość pokryłam INM Northern Lights Gold.

I decided I want to colour my leaves with sheer tint, so I picked some autumnal colours and started filling the shapes with a dotting tool. I used my DIY tints in 2 (yellow), 6 (coral), 9 (dark wine) and 17 (brown). The tints bubbled a bit so I covered the whole thing with INM Northern Lights Gold.


Poniżej możecie zobaczyć płytkę jakiej użyłam..

Below You can see the plate I used..

Źródło: http://uberchicbeauty.com/

..oraz większość produktów.

..and most of the products.


Kolejną rzeczą jakiej użyłam podczas tworzenia dzisiejszego mani jest pierścionek Ring Palette z Born Pretty Store. Oto jak on wygląda:

Another thing I used while creating today's manicure is a Ring Palette from Born Pretty Store. Here's how it looks like:


To gadżet używany do ręcznego malowania farbkami. Wygląda on zasadniczo jak zwykły pierścionek, jest zrobiony z metalu i ma dostosowywaną obrączkę. Możemy wycisnąć na jego powierzchnię nasze farbki (w moim przypadku - tinty) i włożyć na palec. To alternatywa dla każdej innej rzeczy jakiej zazwyczaj używamy, jak kawałka papieru/folii leżacego gdzieś w obrębie naszego miejsca pracy. Przy pierścionku mamy łatwy dostęp do farbek i nie ma ryzyka, że wsadzimy sobie rękaw w plamę farby. Ring Palette możecie znaleźć TUTAJ.

It's a gadget used for free hand painting. It basically looks like a regular ring, it's made of metal and has an adjustable band. We can put our paints (in my case - tints) on it's surface and place it on a finger. It's an alternative for any other thing we usually use, like a piece of paper/plastic laying somewhere on our working space. With the ring we have easy access to the paints and there's no risk of putting our sleeve in a blob of paint. You can find the Ring Palette here KLIK.


Jeśli zdecydujecie się złożyć zamówienie w sklepie Born Pretty Store, koniecznie skorzystajcie z mojego kody HMG10 żeby dostać 10% rabatu na wszystkie produkty, które nie są objęte inną promocją.

If You decide to place an order on Born Pretty Store, be sure to use my code HMG10 to get 10% off any items that aren't already on sale.